So far, we barely touched the database part of the project; in this post, we will roll back all we have done and start with a new Postgres service using a preinstalled/configured PostGIS docker image. It is the easiest and safest way to set up PostGIS.
Please note that this post is for learning purposes only; it's meant to help understand how to use PostGIS in Laravel without the need for any package. In future posts, we will refactor/change most of the code.
- First, make sure you run "docker-compose down" to stop and remove any running container.
docker-compose down
- Now go on and delete the volume used for Postgres persistence (we want to start 100% fresh):
docker volume rm laravel-gis_postgres-data
- Edit the docker-compose.yml file postgres service like this:
(...)
    postgres:
        image: postgres:latest
        image: postgis/postgis:15-3.3
        volumes:
            - postgres-data:/var/lib/postgresql/data
        ports:
            - "5432:5432"
        environment:
            POSTGRES_PASSWORD: 12345
            POSTGRES_USER: laravelgis
            POSTGRES_DB: laravelgis
            PGDATA: /var/lib/postgresql/data
        networks:
            - backend
(...)
We use the PostGIS team official docker image instead of the Postgres one.
- Running "docker-compose up" again will download the PostGIS image, recreate the database but with the PostGIS extension enabled, you can verify that everything worked correctly by running the following SQL query in your favorite Postgres client on the database and getting the same result:
SELECT PostGIS_Full_Version();

POSTGIS="3.3.2 4975da8" [EXTENSION] PGSQL="150" GEOS="3.9.0-CAPI-1.16.2" PROJ="7.2.1" LIBXML="2.9.10" LIBJSON="0.15" LIBPROTOBUF="1.3.3" WAGYU="0.5.0 (Internal)" TOPOLOGY
- In Laravel, let's create a model, a migration, and a factory for the monuments data we have in geojson at the moment:
dr php artisan make:model Monument -mf
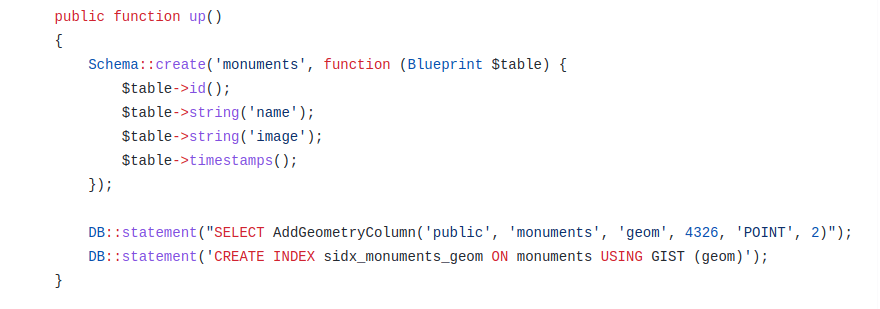
- In the newly created migration file, let's add the following content:
<?php

use Illuminate\Support\Facades\DB;
use Illuminate\Support\Facades\Schema;
use Illuminate\Database\Schema\Blueprint;
use Illuminate\Database\Migrations\Migration;

return new class extends Migration
{
    /**
     * Run the migrations.
     *
     * @return void
     */
    public function up()
    {
        Schema::create('monuments', function (Blueprint $table) {
            $table->id();
            $table->string('name');
            $table->string('image');
            $table->timestamps();
        });

        DB::statement("SELECT AddGeometryColumn('public', 'monuments', 'geom', 4326, 'POINT', 2)");
        DB::statement('CREATE INDEX sidx_monuments_geom ON monuments USING GIST (geom)');
    }

    /**
     * Reverse the migrations.
     *
     * @return void
     */
    public function down()
    {
        Schema::dropIfExists('monuments');
    }
};
We manually use the AddGeometryColumn PostGIS function (we could also have used the geometry column type available in Laravel) to create a geometry column of type point with srid of 4326 on the table. We then create a spatial index on the geometry field.
- We can now run our migrations:
dr php artisan migrate
- Let's not forget disable Laravel Mass Assigment protection on our model (app/Models/Monument.php) because we will be playing around with the create static method:
<?php

namespace App\Models;

use Illuminate\Database\Eloquent\Factories\HasFactory;
use Illuminate\Database\Eloquent\Model;

class Monument extends Model
{
    use HasFactory;

    protected $guarded = [];
}
- Now, we want to load the geojson data (the resources/geojson/monuments.geojson) into the database, but how can we insert it into this geometry field we created on the monuments table? Well, PostGIS offers a convenient and well-named "ST_GeomFromGeoJSON" function. However, we have a geojson file with many (4) features containing attributes and geometry. The PostGIS documentation for this function states that: "ST_GeomFromGeoJSON works only for JSON Geometry fragments. It throws an error if you try to use it on a whole JSON document.". It means we will have a little bit of parsing to do before individually inserting each feature with its attributes and geometry in the monuments table. I like to create Laravel commands, which are easy to reuse, queue, schedule, etc. Let's take that path and create a new command in the Laravel application:
dr php artisan make:command ReloadMonuments
In the new file (app/Console/Commands/ReloadMonuments.php), let's put the following content:
<?php

namespace App\Console\Commands;

use App\Models\Monument;
use Illuminate\Console\Command;
use Illuminate\Support\Facades\DB;

class ReloadMonuments extends Command
{
    /**
     * The name and signature of the console command.
     *
     * @var string
     */
    protected $signature = 'laravel-gis:reload-monuments';

    /**
     * The console command description.
     *
     * @var string
     */
    protected $description = 'Truncate the monuments table and reload the geojson';

    /**
     * Execute the console command.
     *
     * @return int
     */
    public function handle()
    {
        $geojson = file_get_contents(resource_path('/geojson/monuments.geojson'));

		// Delete all existing records from the monuments table
        Monument::truncate();

		// Decode the geojson file content (it's json after all) into an array, create a Laravel collection
		// from the features element, loop through each feature and create a monument in the
		// database. For the geom field, we use a raw expression to use the ST_GeomFromGeoJSON
		// function, passing it the feature's geometry fragment re-encoded to json.
        $features = collect(json_decode($geojson, true)['features'])->each(function ($feature) {
            Monument::create([
                'name' => $feature['properties']['name'],
                'image' => $feature['properties']['image'],
                'geom' => DB::raw("ST_GeomFromGeoJSON('" . json_encode($feature['geometry']) . "')"),
            ]);
        });

        $this->info($features->count() . ' monuments loaded successfully.');

        return 0;
    }
}
Now you can run the command and load our geojson data to postgis:
dr php artisan laravel-gis:reload-monuments

4 monuments loaded successfully.
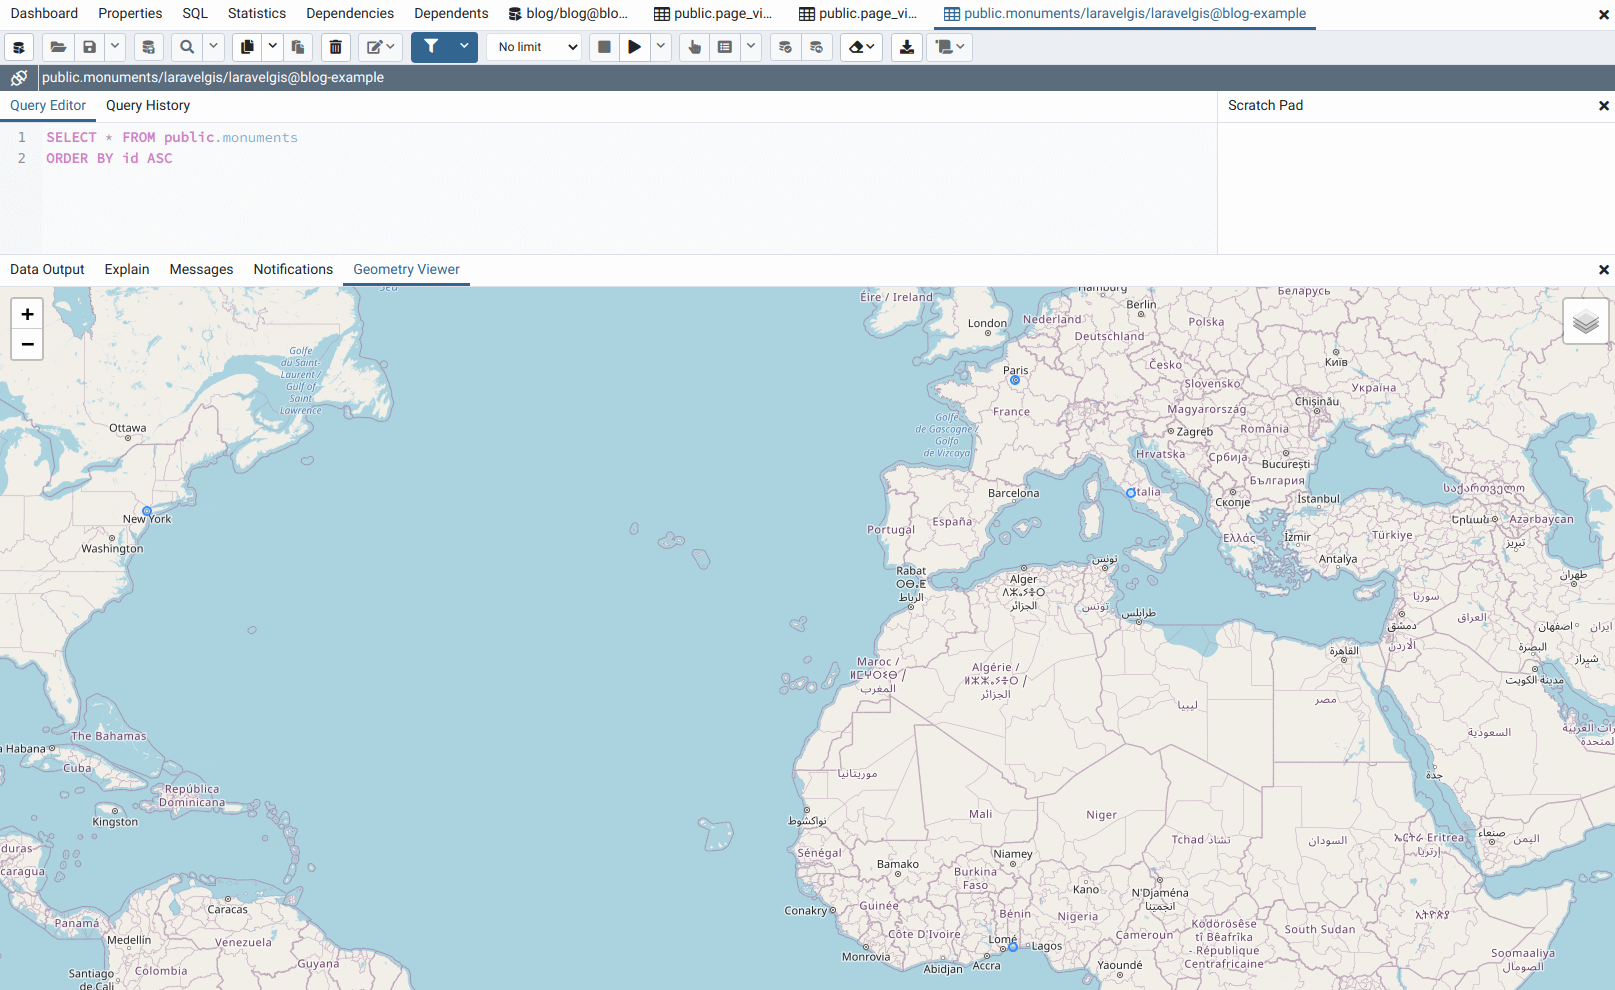
If you have any client that supports PostGIS data viewing, you can now visualize it; the following example is with pgAdmin:
- The final goal for this post is to be able to use our new database stored data into the OpenLayers web map. Let's first have a look at the data we have in our monuments table by using Laravel Dump and Die function: "dd(Monument::all());":
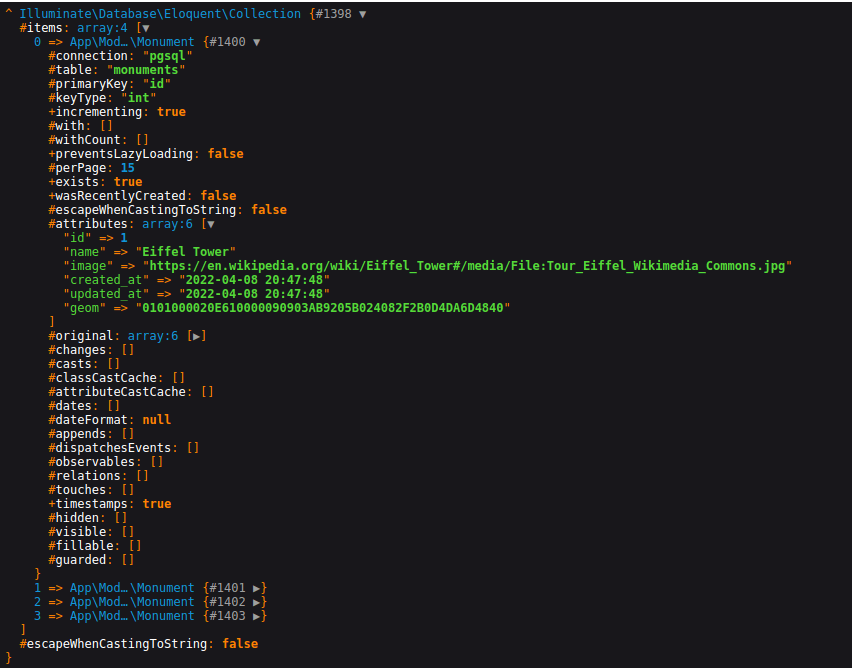
We can see that the geom column is binary; it's useful for PostGIS indices but not for us at this time. PostGIS offers the ST_GeomFromGeoJSON's reverse function ST_AsGeoJSON, which also translates one geometry to a geojson geometry fragment. It leaves the job to us to recreate the full geojson content from our query result. We will still work directly in the routes/web.php file as we will not keep this code for a very long time:
<?php

use App\Models\Monument;
use Illuminate\Support\Facades\Route;

Route::get('/', function () {
    return view('welcome');
});

Route::middleware([
    'auth:sanctum',
    config('jetstream.auth_session'),
    'verified'
])->group(function () {
    Route::get('/dashboard', function () {
    $geojson = file_get_contents(resource_path('/geojson/monuments.geojson'));
// We create a new array with the base geojson content
    $geojson = [
        'type' => 'FeatureCollection',
        'features' => [],
    ];

// Again, we use a raw function to call the ST_AsGeoJSON postgis function
// then we loop through each monument and recreate the geojson fragments
    Monument::selectRaw('id, name, image, ST_AsGeoJSON(geom) as geom')
        ->get()
        ->each(function ($monument) use (&$geojson) {
            $geojson['features'][] = [
                'type' => 'Feature',
                'properties' => [
                    'name' => $monument->name,
                    'image' => $monument->image,
                ],
                'geometry' => json_decode($monument->geom, true),
            ];
        });

    return view('dashboard', ['geojson' => $geojson]);
// Finally, we encode the array to json before passing it to the view, the content.
// should be exactly the same as when we were using the geojson file directly.
    return view('dashboard', ['geojson' => json_encode($geojson)]);
})->name('dashboard');
Now we are back to where we were on the frontend side but are using PostGIS instead of a simple geojson file:
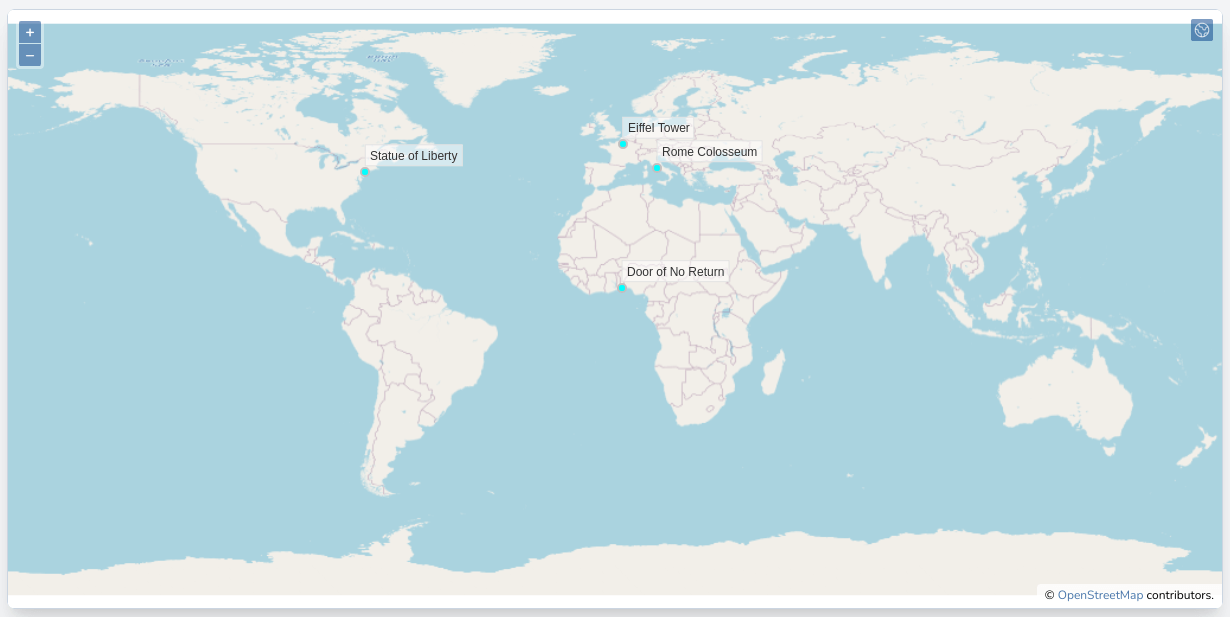
Moreover, we now have a simple Laravel Eloquent Model with all the advantages of working with such a powerful and elegant ORM. The downside is all the code we have to write to make it work. Using so many loops, collection manipulations after querying the database, using raw queries, passing arguments by reference, etc. In my opinion, these are signs that or
- we are not doing things right and have to refactor our code,
- we are trying to reinvent the wheel.
In our case, I lean towards the second option; what we would need here is to build a web service api to serve our features. Such standardized protocols already exist for serving geospatial vector layers. One very powerful is the WFS protocol maintained by the Open Geospatial Consortium. Web Feature Service seems to be what we need to eliminate some of our ugly route file code in Laravel.
In the next post, we will set up an open source powerful geospatial data server: Geoserver. Geoserver has support for WFS services, so it's the first aspect that we will explore and set up.
The commit for this post is available here: setting-up-postgis-with-docker